When I filled this cushion, for
Crosstown Shade and Glass, I stood back to have a look at the pattern match, and I couldn't believe I had sewn it! (Yeah, I know, I've only had 30+ years experience sewing cushions, but still!) Matching pattern without welting is always tricky, and this required joining widths, as well.
Welting provides a little buffer between the two layers of fabric, giving a little wiggle room, like this:
Or as in the pillows accompanying the cushion:
Perhaps there's a mathematical way to cut boxing to match the cushion body, but I need a more literal approach.
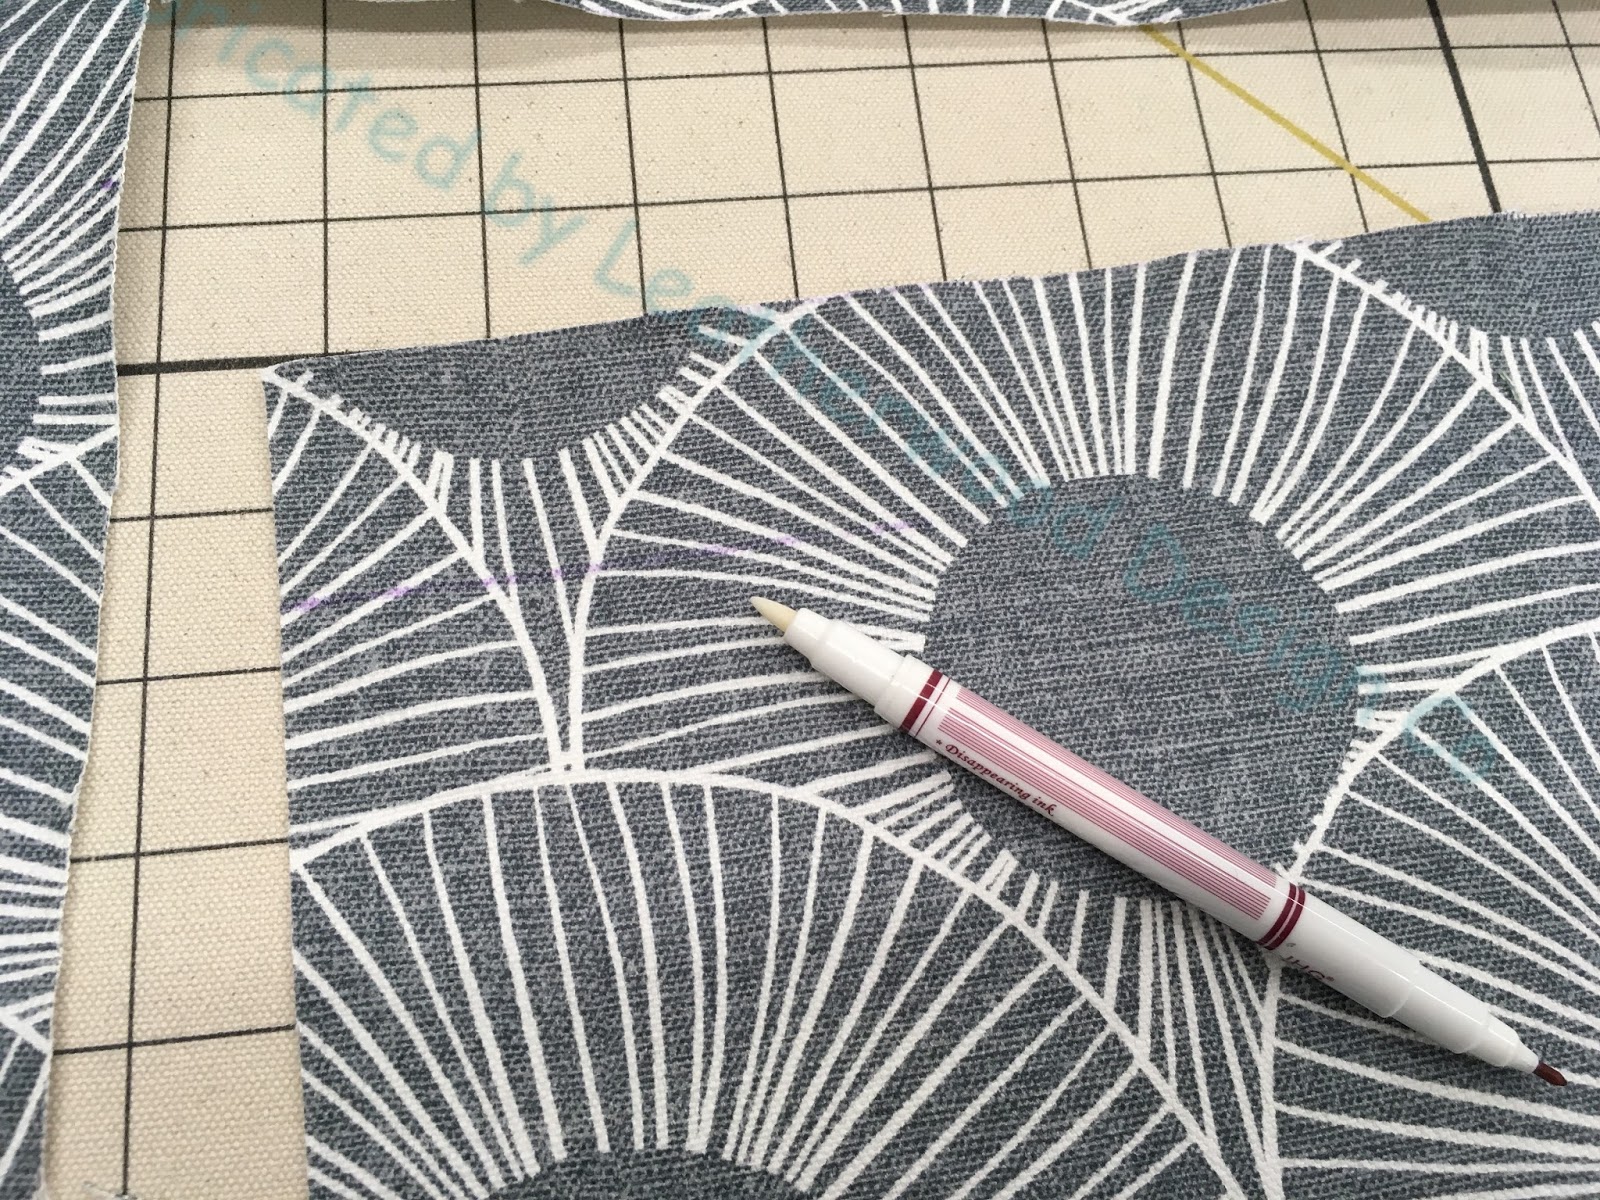
After I've cut the body..... just pretend this little strip is a cushion body, for illustration purposes..... I mark the seam allowance using a clear ruler and an erasable pen. I use a 3/4" seam allowance, but other fabricators use 1/2" or 5/8" or 3/4" or whatever they're comfortable with.
I lay the body piece on the fabric that will become the boxing strip, matching up the pattern, and draw an erasable line at the body's cut edge.
I then mark and erasable line 1.5" away from that first line- that gives a 3/4" seam allowance on both the body and the boxing pieces.
I cut the boxing strip on that line; then I'll use a rotary cutter and straightedge to cut the other side of the boxing strip (not shown). Regarding pattern centering: my concern is to center the pattern properly on the cushion body, not on the boxing strip. The boxing strip is cut to allow the pattern to match and flow, and won't necessarily have a centered feature. Perhaps there might be other situations where it would make more sense to work from the boxing, but in this case, I worked from the body.
I remove the first purple line with the eraser end of the marking pen. NOTE: always test your fabric first, to be sure the purple pen will erase from your fabric!
I turn the boxing strip over and mark a 3/4" line which will be the stitching line.
I crease along that line- I finger-pressed this particular fabric but you could use an iron if necessary.
I lay the boxing on the body, aligning the pattern. (That top piece is the body- we're pretending that it's a normal size- it was cut small for this illustration.)
I fold the boxing back so the two pieces are right sides together.
Checking the pattern as I go, I pin frequently.
At the sewing machine, I sew along the purple line which is also creased.
I check the pattern match before leaving the machine, in case any little sections need to be taken out and re-sewn, and then I press it open very very lightly.
And there you have it! The bottom edge of the boxing will not match the other side of the body, unless you cut the body to match the boxing, in which case the pattern on the other side of the body will be upside down, and not be the same as the front, and also likely will not be centered. You can do that if you wish if the pattern is not obviously directional and if it's aesthetically pleasing.


No comments:
Post a Comment